How to make an Editable PowerPoint with NotebookLM using Canva or OCR tools

- 1. Complete Workflow: NotebookLM to Editable PowerPoint
- 1.1. Step 1: Prepare Your Source Documents
- 1.2. Step 2: Upload Documents to NotebookLM
- 1.3. Step 3: Generate a Slide Deck
- 1.4. Step 4: Review the Generated Slides
- 1.5. Step 5: Export the Slides as a PDF (Best Practice)
- 1.6. Step 6: Rebuild the PDF into an Editable PowerPoint (Free & Automatic)
- 1.7. Step 7: Download and Open the Editable PowerPoint
- 1.8. Step 8: Optional Final Polish in PowerPoint
- 2. Free vs Paid: What You Need to Know
- 3. Practical Tips for Better Results
- 4. Limitations to Be Aware Of
- 5. Frequently Asked Questions
- 5.1. Can NotebookLM create an editable PowerPoint directly?
- 5.2. Why is PDF better than direct PPT export?
- 5.3. Is this workflow completely free?
- 5.4. Can Canva really convert slides back to PowerPoint?
- 5.5. What are the best use cases for this workflow?
- 6. Final Thoughts
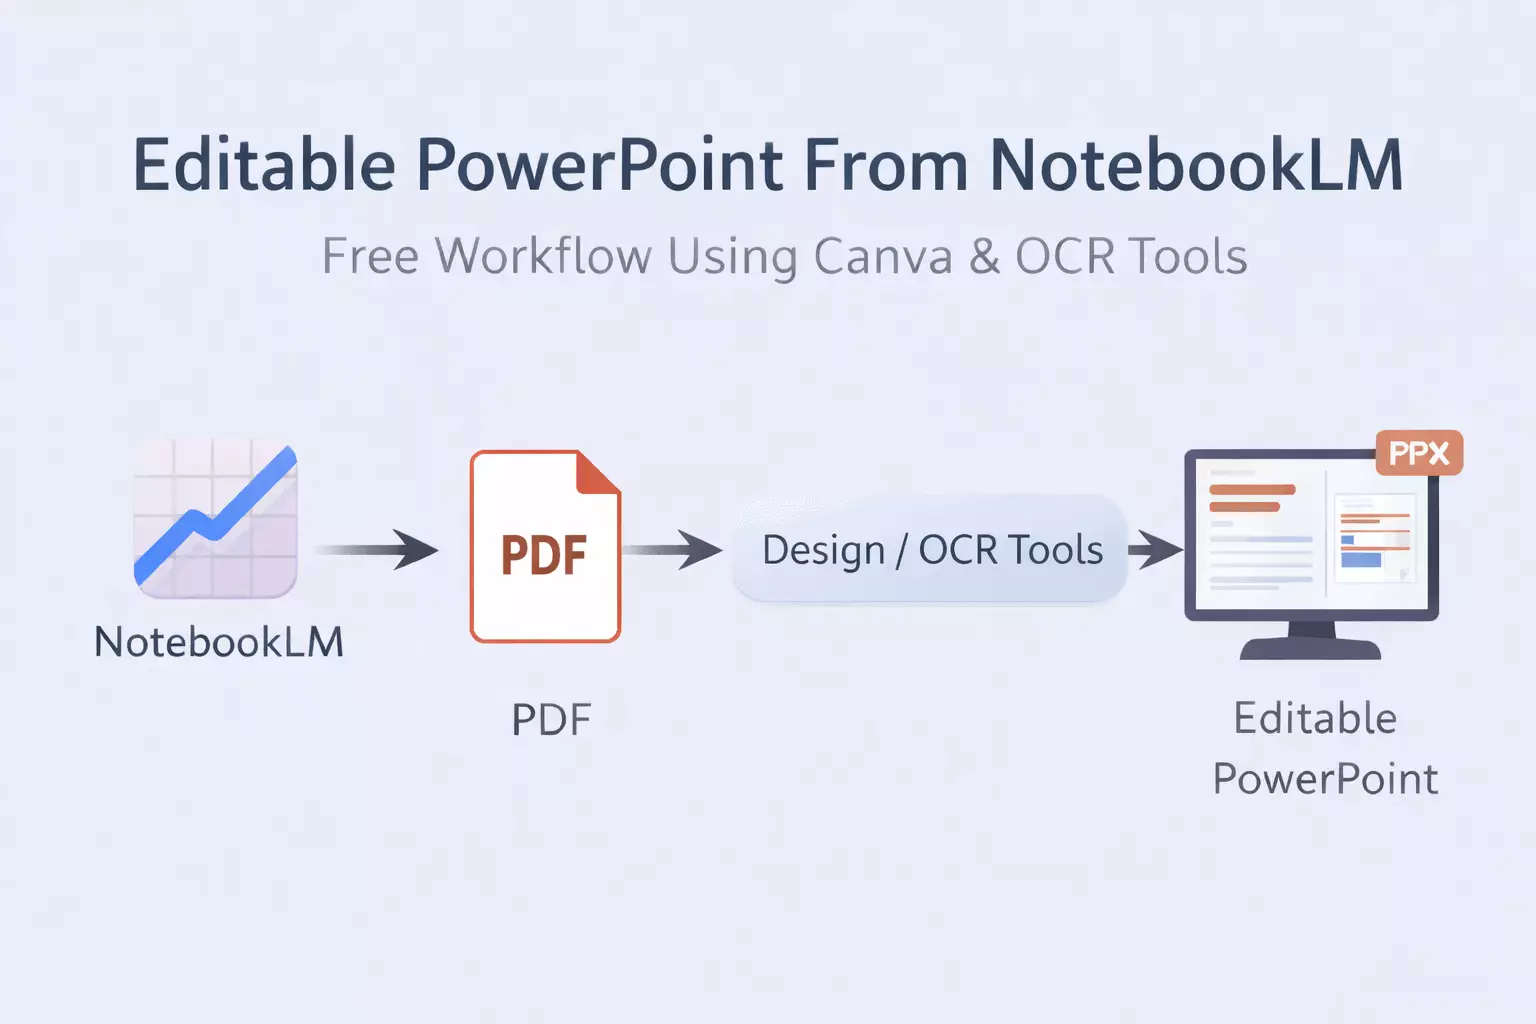
NotebookLM makes it easy to turn documents into slide decks, but many users quickly realize a problem: the exported slides look fine, yet editing them in PowerPoint feels restricted as the content is flattened into an image or "locked". This is where most tutorials stop — and where frustration begins. This tutorial shows how to make an editable PowerPoint with NotebookLM for free, using Canva or OCR-based tools.
A practical workflow where instead of relying on direct PPT exports, we will intentionally export slides as a PDF and then automatically rebuild them into an editable PowerPoint. The result is a clean, usable PPT without manually recreating slides.
Disclosure: This article contains affiliate links. If you sign up through them, we may earn a commission at no extra cost to you. It helps cover hosting, coffee, and the time spent testing tools like this — appreciate the support.
Complete Workflow: NotebookLM to Editable PowerPoint
Step 1: Prepare Your Source Documents
NotebookLM works best with structured content. Before uploading anything, clean your source files.
Recommended preparation:
-
Use clear headings and sections
-
Remove unnecessary pages or references
-
Prefer text-based documents over heavily designed PDFs
This improves how NotebookLM converts documents into slides and reduces errors later.
Step 2: Upload Documents to NotebookLM
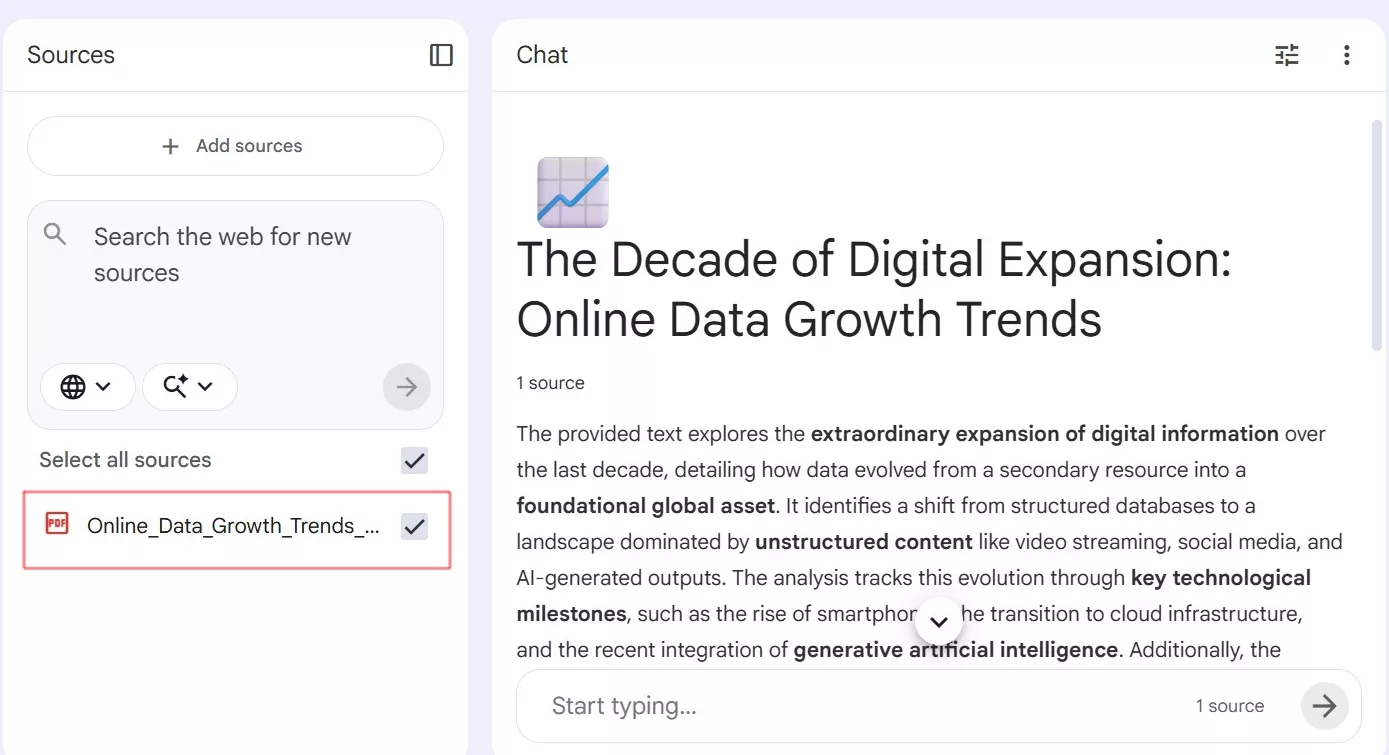
Open Google NotebookLM and upload your prepared documents. These can include research papers, reports, notes, or internal documentation.
NotebookLM analyzes the content and prepares it for transformation. At this stage, it’s acting as a research and summarization tool — not a design platform.
NotebookLM is available through Google Workspace. If you’re new, Google offers a free trial so you can test the workflow without paying upfront.
For more context on how different AI tools shape workflows and productivity, check out our guide on AI tools that expand your productivity.
Step 3: Generate a Slide Deck
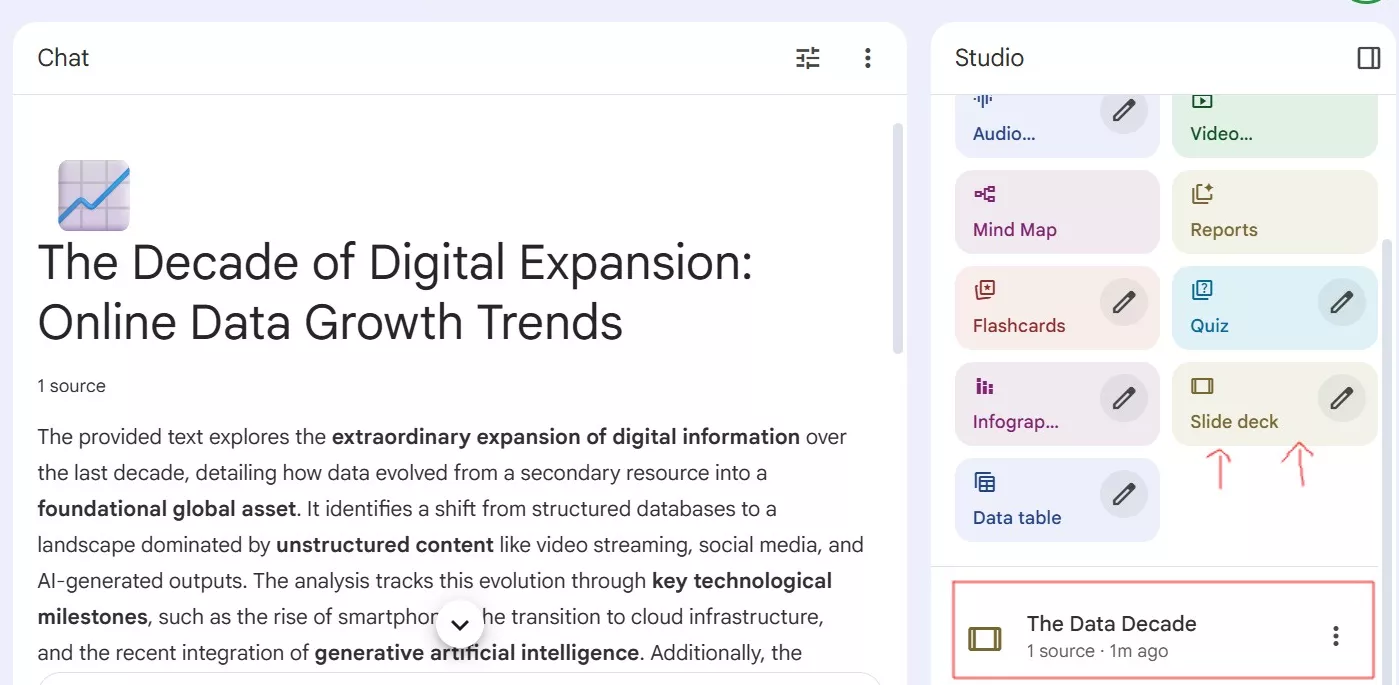
Ask NotebookLM to create a presentation-style output.
Good instructions include:
-
Requesting slide-wise summaries
-
Asking for concise bullet points
-
Keeping the focus on structure, not visuals
NotebookLM will generate a NotebookLM slide deck that represents your content logically. This is where it functions as an AI slide generator and saves the most time.
If you enjoy exploring automation in creative workflows, see our breakdown of AI creative tools automation.
Step 4: Review the Generated Slides
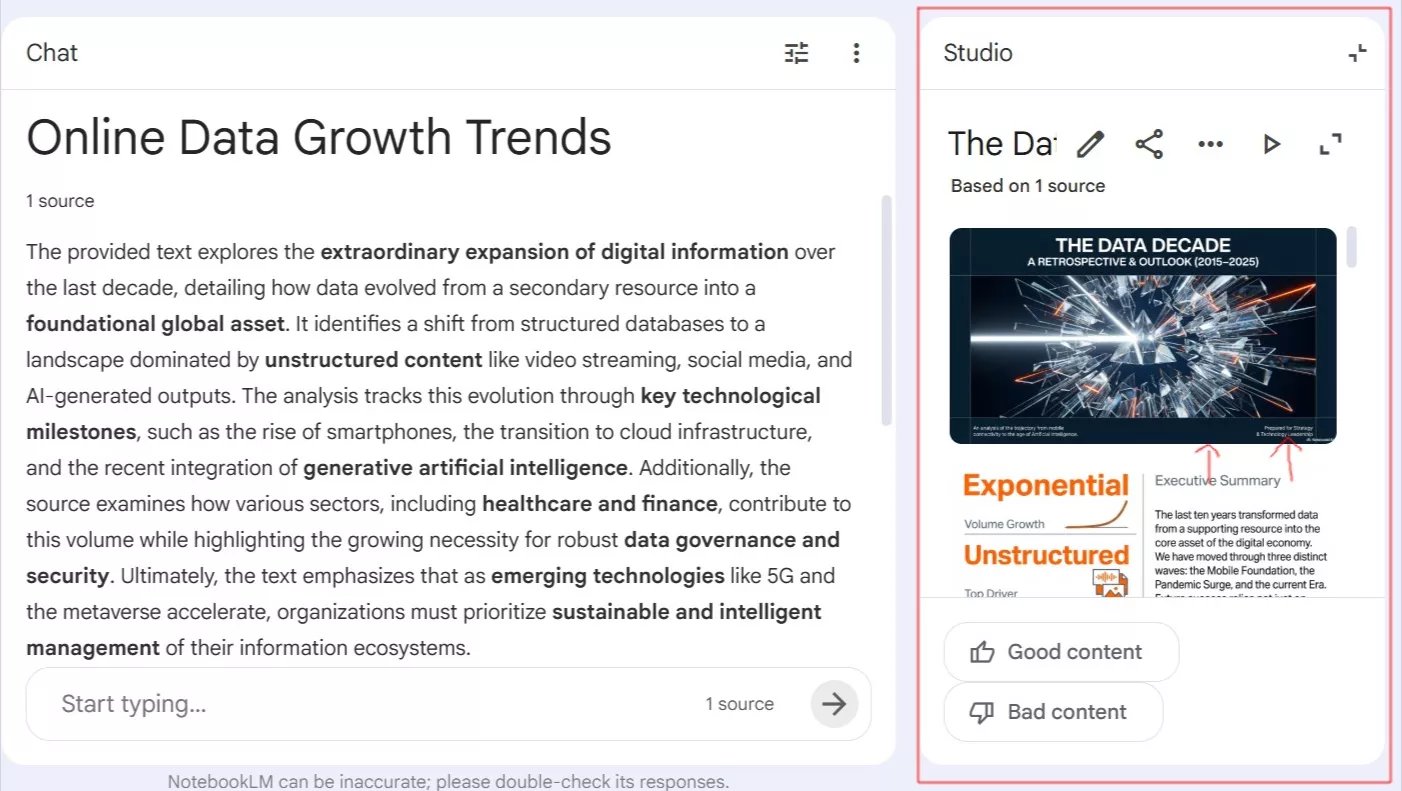
Before exporting, quickly review the slides inside NotebookLM.
Check for:
-
Logical slide order
-
Slides that are too text-heavy
-
Missing or unclear headings
Minor adjustments here prevent larger fixes later.
Step 5: Export the Slides as a PDF (Best Practice)
Even though the goal is an editable PowerPoint, export the slides as a PDF at this stage.
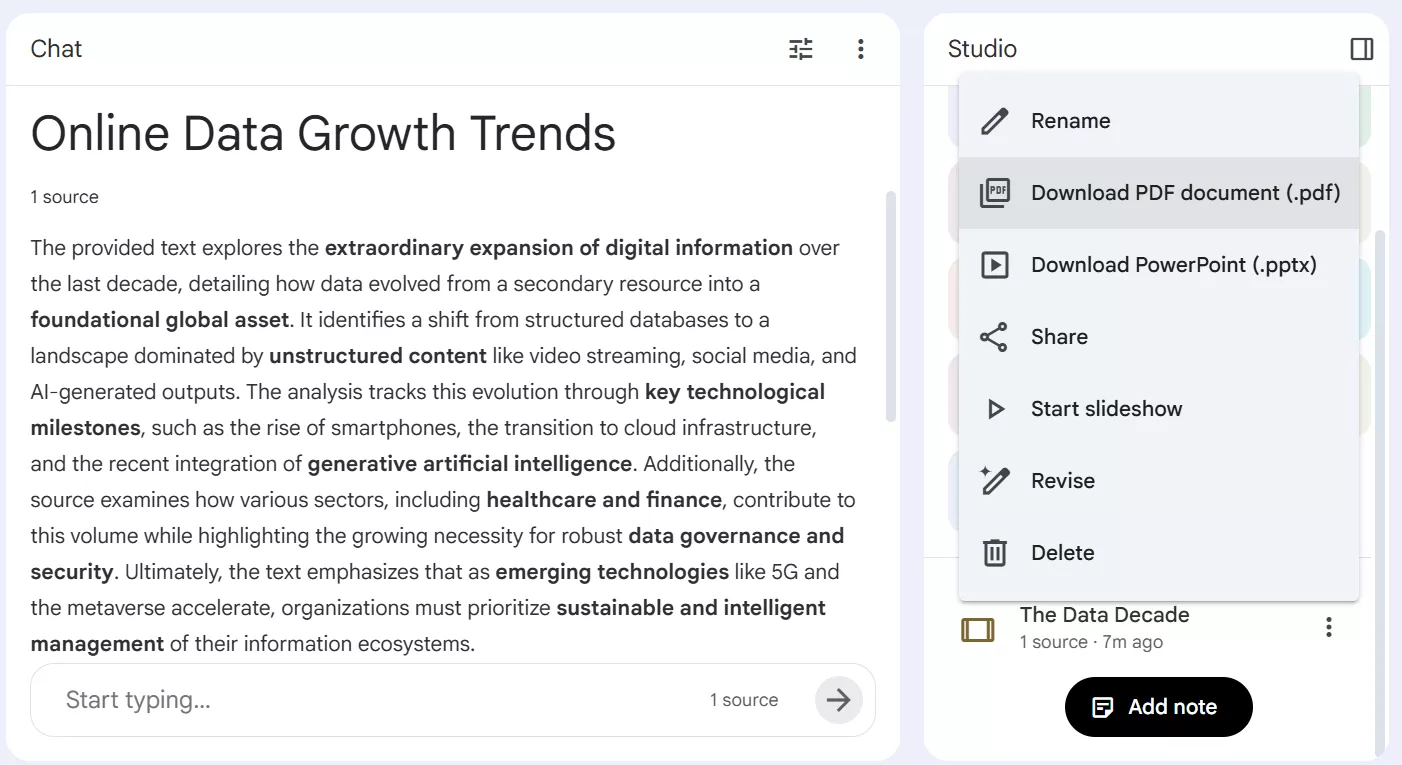
This step is intentional.
Why PDF works better:
-
Layout is preserved more reliably
-
Canva and OCR tools perform best on PDFs
-
You avoid partially flattened PPT exports
This is the most reliable foundation for creating an editable PowerPoint from NotebookLM.
NotebookLM is part of Google Workspace, and Google provides a free trial that’s enough to follow this tutorial and test the slide workflow.
Step 6: Rebuild the PDF into an Editable PowerPoint (Free & Automatic)
Now comes the key step that most guides miss.
Option 1: OCR-Based Converters (Recommended)
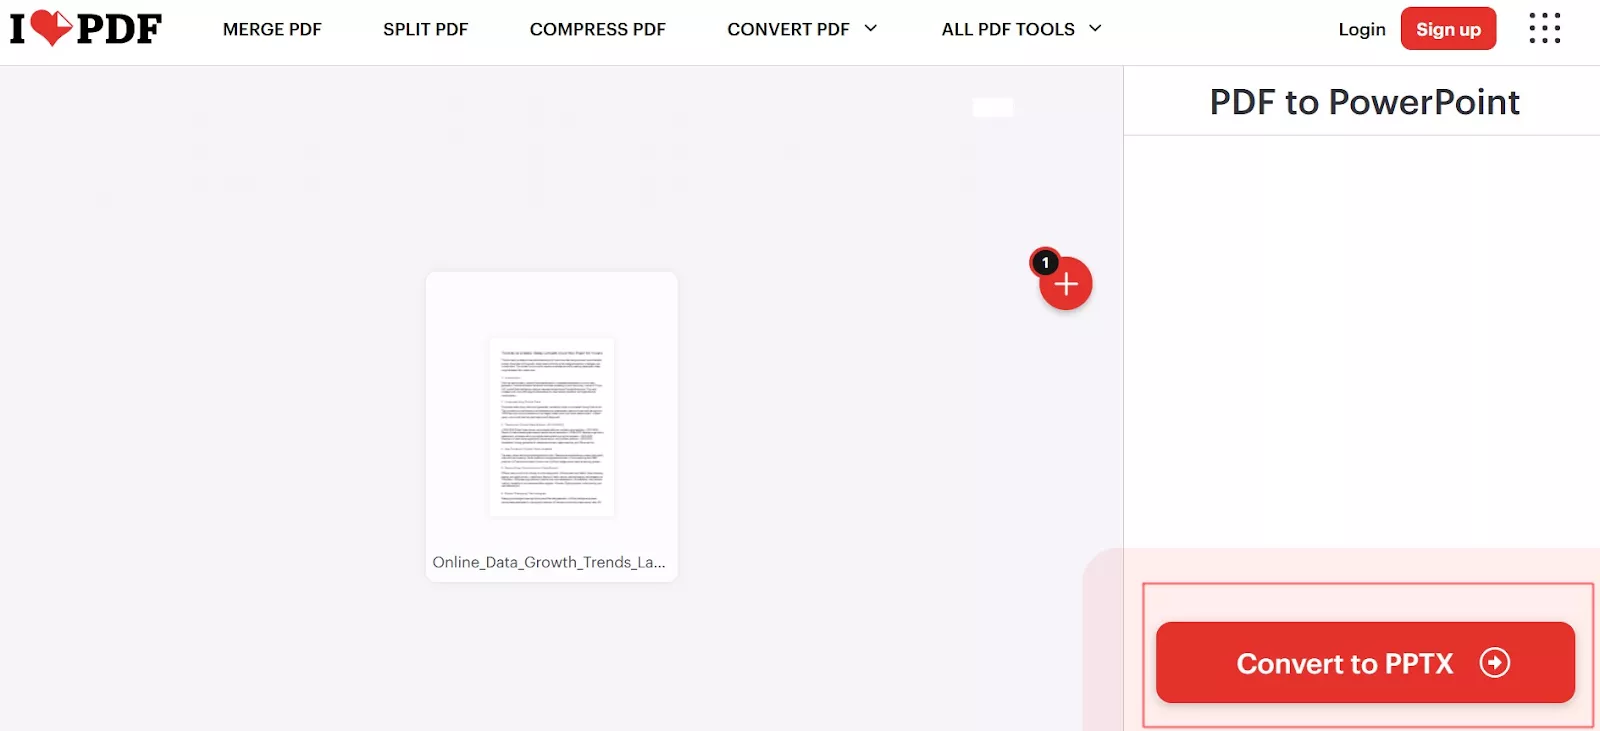
To get the desired result, OCR tools like Smallpdf or iLovePDF can help.
How they work:
-
Upload the PDF
-
The tool scans text and layout using OCR
-
An editable PowerPoint file is generated
Free plan notes:
-
Limited daily usage
-
Layout accuracy may be lower than Canva
-
Best for simple slides
This is the easiest way to create an editable PowerPoint with NotebookLM and OCR converters.
Option 2: Canva PDF Rebuild (Fallback)
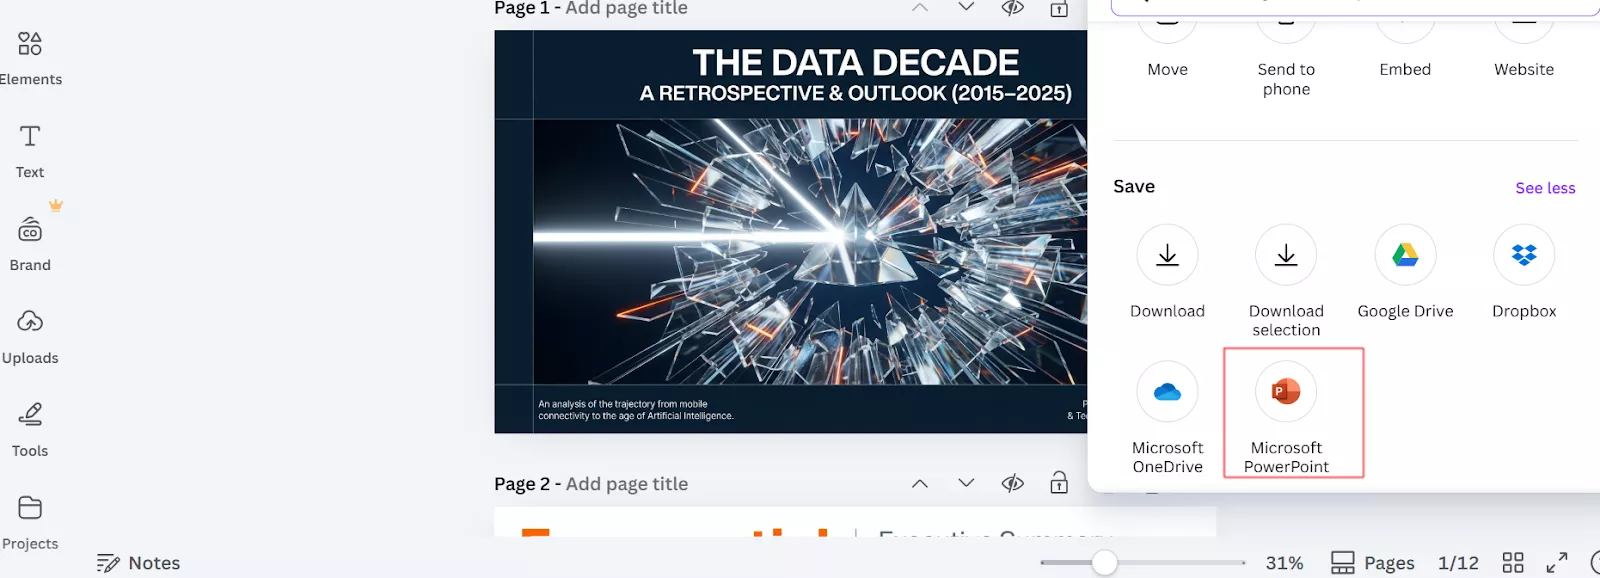
If the OCR Converters doesn’t work go to canva and create an account — the free account is perfect for this workflow.
Steps:
-
Click Upload and upload your PDF
-
Let Canva process the file
-
Canva automatically detects text, shapes, and layout
-
Go to Share → Download → PowerPoint (.pptx)
Canva rebuilds flattened slides into real, editable text boxes and elements. Because NotebookLM slides are usually clean and structured, Canva’s import engine works especially well here.
Free plan notes:
-
Fully usable for basic rebuilding
-
Some fonts or brand kits require Pro
-
Most text-based presentations work fine on free
This is also an effective way and works as a back plan it is only recommended to use as fallback.
Step 7: Download and Open the Editable PowerPoint
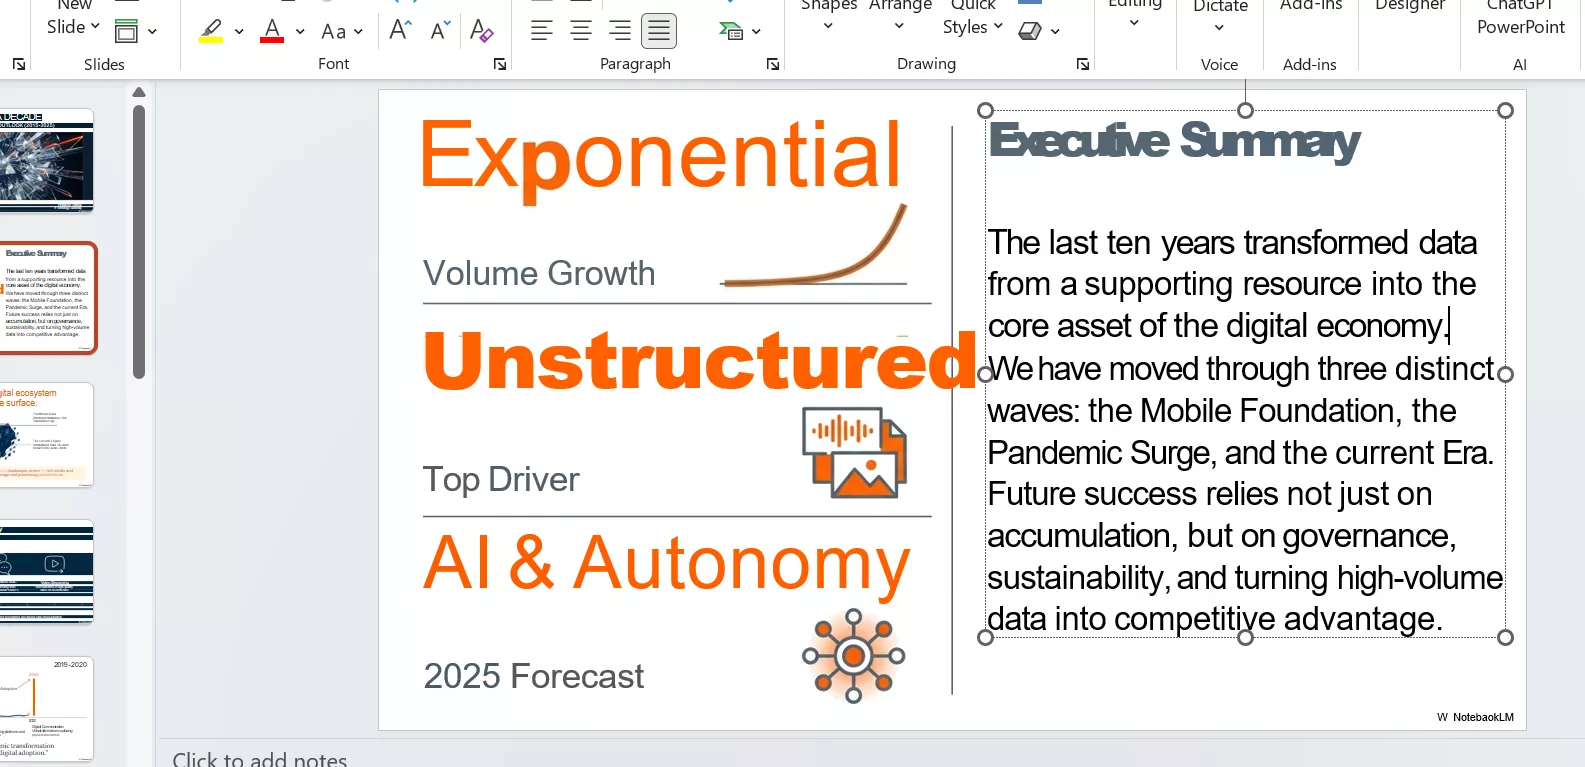
Download the rebuilt .pptx file and open it in Microsoft PowerPoint.
At this point:
-
Text is editable
-
Slides are no longer image-based
-
Minor spacing or font adjustments may be needed
This completes the NotebookLM to PowerPoint workflow with editability restored.
Step 8: Optional Final Polish in PowerPoint
For professional use, a light final polish is recommended.
You may want to:
-
Apply a theme or brand template
-
Adjust spacing and alignment
-
Add charts, visuals, or animations
NotebookLM handled content creation. Canva or OCR tools handled editability. PowerPoint is now only for finishing touches.
Free vs Paid: What You Need to Know
This entire process can be completed for free:
-
NotebookLM: free
-
Canva PDF rebuild: free account
-
OCR tools: free with limits
Paid plans are useful if:
-
You convert presentations frequently
-
You need brand kits or advanced fonts
-
You want higher OCR limits
For most users, free tiers are sufficient.
Practical Tips for Better Results
-
Keep slides text-focused during generation
-
Avoid complex visuals in NotebookLM
-
Always export as PDF first
-
Use Canva before OCR tools
These small choices improve accuracy and reduce cleanup work.
Limitations to Be Aware Of
Even with automatic rebuilding:
-
Fonts may change
-
Tables or charts may need adjustment
-
Perfect layout recreation isn’t guaranteed
These are normal trade-offs in document-to-slide automation.
Frequently Asked Questions
Can NotebookLM create an editable PowerPoint directly?
It can export PPT files, but editability is inconsistent. PDF rebuilding is more reliable.
Why is PDF better than direct PPT export?
PDF preserves layout and works best with Canva and OCR rebuild tools.
Is this workflow completely free?
Yes, all steps can be done using free plans, with optional paid upgrades.
Can Canva really convert slides back to PowerPoint?
Yes, Canva rebuilds text and layout and allows export as an editable PPTX.
What are the best use cases for this workflow?
Research presentations, academic slides, internal reports, and first-draft decks.
Final Thoughts
If you combine NotebookLM with the right rebuild tools, it becomes a powerful way to create presentations quickly. Knowing how to make an editable PowerPoint with NotebookLM and Canva/OCR tools is the difference between locked slides and a flexible, reusable presentation.
This tutorial focuses on what actually works — using free tools, clear steps, and realistic expectations.
If you plan to use NotebookLM regularly, starting with Google Workspace’s free trial lets you explore its features before committing to a paid plan.
Looking for more step-by-step tech tutorials and software guides? Explore more tech tutorials and tools on TrendVerse.


Comments (0)
Leave a Comment